The Best Nail Guns for DIY: Which One to Buy First (2026)
The best nail gun for DIY is almost always an 18-gauge cordless brad nailer. Here are five routes into the category — cordless, pneumatic, trim, whole-shop and a manual staple gun — and which one to buy first.

- Category
- Nailers & Fastening
- Tools tested
- 5
- Read time
- 26 min
- Updated
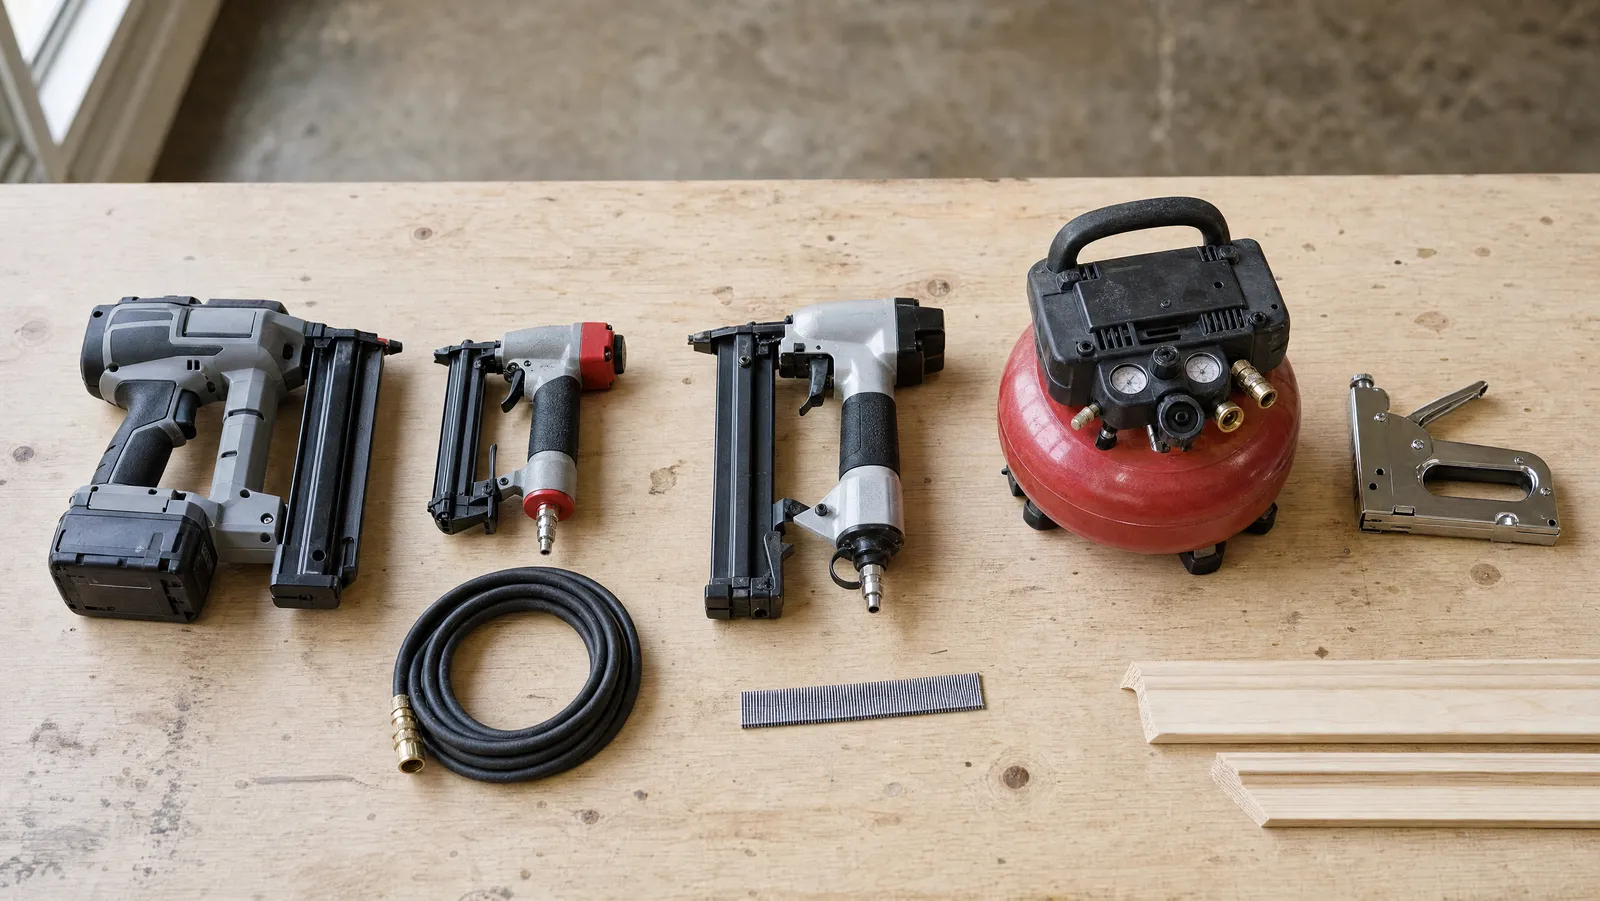
For most DIYers the best nail gun for DIY work is an 18-gauge cordless brad nailer. It needs no compressor, no hose and no second purchase, and it drives the fasteners that hold most of what a homeowner fastens: trim, shoe moulding, cabinet backs, drawer boxes, frames, small shop furniture. Our first pick is the WEN 20512, at $108.00 as of November 2026.
Most "best nail gun" lists are five brad nailers in a row, which is only useful if you have already decided you want a brad nailer. The question nearly everyone actually arrives with is different: which kind of nail gun, and do I have to buy an air compressor too? So this guide is organised by route in, not by brand: a complete cordless gun, the cheapest pneumatic gun, the 16-gauge step up for trim that has to hold, a compressor-plus-three-nailers kit, and a $19.95 manual staple gun that is not a nail gun at all.
If there is no drill, no saw and no decent tape measure in the house yet, a nailer is not your next purchase — start with the essential DIY tools and come back.
Added up, the five picks below come to $606.08 as of November 2026. Nobody should buy all five. Four of them are nail guns or nailer kits; the fifth is a manual staple gun. Most readers of this page should spend between $39 and $110 and stop.
Which nail gun do you actually need?
Start from the job, not the tool. Nail guns are specialists, and the fastener they drive is what defines them — not the badge on the side. There are six families a homeowner is likely to meet:
- Brad nailer (18-gauge) — thin trim, shoe moulding, cabinet backs, picture frames, shop jigs. According to Pro Tool Reviews, the small head of an 18-gauge brad leaves a minimal hole and reduces the risk of splitting thinner wood, which is why it is the default for light trim work.
- Finish nailer (16- or 15-gauge) — baseboard, door and window casing, chair rail, crown moulding. According to Fine Homebuilding, the 16-gauge nailer is the workhorse on many trim-carpentry jobs: big enough for reasonable holding power, still not too big a hole, and ideal for baseboards, chair rails and crown moulding. Fine Homebuilding puts 15-gauge in the heavyweight role — the largest of the group, for work where holding power and strength are paramount, such as hanging interior doors or installing exterior trim. DEWALT's published range for its 15-gauge angled finish nailer is 1-1/4 in. to 2-1/2 in.
- Pin nailer (23-gauge) — tiny headless pins for delicate detail. According to Fine Homebuilding, 23-gauge pins are ideal for small, delicate trim pieces and leave a nearly invisible hole, while slightly larger 21-gauge pins give more holding power. Reviewers treat a pinner as a clamp substitute rather than a structural fastening tool.
- Framing nailer — studs, joists, sheathing, decks, fences. According to Fine Homebuilding's guide to choosing a framing nailer, model codes were written for hand-driven nails, so they specify nail size, spacing and number rather than head type — regional code requirements and local habit decide what is normal in your area. Full round-head nails are the safe default: Fine Homebuilding notes they are acceptable everywhere in the United States and for every type of framing connection.
- Roofing nailer — coil-fed, short, large-headed nails for asphalt shingles and felt. A single-purpose tool most homeowners should rent rather than own.
- Crown stapler — wide-crown staples for sheet goods, house wrap and lath, where a staple's two legs and its bridge hold better than one nail head.
Most homeowners only ever need the first two. A brad nailer handles light trim and shop work; a finish nailer handles the trim that has to stay put. Everything else is a tool you buy when a specific project demands it. The long version of this list, family by family, is nail gun types explained.
Be honest about the alternative, too. A claw hammer still wins for a handful of nails — it costs nothing extra, never runs out of air or battery, and for ten nails it is faster than fetching a compressor. A nailer earns its place on volume and one-handed work: the moment you are holding six feet of moulding flat against a wall with one hand, a tool you can fire with the other stops being a luxury. If your kit is still thin elsewhere, the best DIY tool kit for beginners is a better home for your first $150 than any nailer.
The five routes in, side by side
Drag to compare all 5 →
Brad nailer: the first nail gun to buy
If you only ever buy one nail gun, buy an 18-gauge brad nailer — and if you do not already own a compressor, buy a cordless one. The reasoning is boring and correct: the tool works the day it arrives, it lives on a shelf rather than in a corner, and it drives the fastener light trim and shop work actually want.

WEN 20512
A complete cordless 18-gauge brad nailer — battery, charger and 400 brads in the box, with no compressor or hose to buy.
Pros
- Ships with a 2.0Ah battery, a charger and 400 18-gauge brad nails
- Drives 18-gauge brads from 3/4 in. to 2 in.
- 100-nail magazine
- LED indicator tracks battery status, magazine fill and tool temperature
Cons
- Commits you to WEN's 20V battery platform
- Its Amazon listing does not publish a nails-per-charge figure
The WEN 20512 is here because it is complete. For $108.00 as of November 2026 the box holds the gun, a 2.0Ah battery, a charger and 400 brad nails — no second order, no hunt for a compatible battery. It drives 18-gauge brads from 3/4 in. to 2 in., spanning shoe moulding at the short end and 1x trim into studs at the long end, and at a nail every 16 in. a 100-nail magazine covers many sticks of moulding between reloads. An LED indicator tracks battery status, magazine fill and tool temperature — a small thing that matters when the gun stops firing and you are working out why.
It is the only cordless nailer among our five picks, so we are describing it on its own merits rather than ranking it against the others. Its Amazon listing does not publish a nails-per-charge figure, so we are not going to invent one.
Now the trap that catches more buyers here than any other: bare tools. CRAFTSMAN's cordless brad nailer, the CMCN618B, sells for $99.00 — $9.00 cheaper than the complete WEN. But it is a bare tool: no battery, no charger. If you already own V20 batteries, that $9.00 saving is real. If you do not, the cheaper sticker is the more expensive purchase, because a battery and charger cost far more than nine dollars. Read the title of every cordless nailer listing twice and look for the words battery and charger included.
If you do already own a compressor, the maths changes completely.

WEN 61723K
The lowest-priced nail gun here, and the best value on the page — as long as you already own an air compressor, because this kit does not include one.
Pros
- Drives 18-gauge brads from 3/8 in. to 2 in.
- Comes with 2,000 nails (500 each of 3/8 in., 3/4 in., 1 in. and 2 in.) and a carrying case
- 106-nail quick-release magazine with a nose latch for clearing jams
- Depth adjustment wheel and a rotatable exhaust
Cons
- Requires a separate air compressor, which is not included
- Needs a 60 to 115 PSI air supply and a 1/4 in. NPT hose, so you work on a tether
The WEN 61723K is $39.16 as of November 2026 — and it will not fire a single nail without a separate air compressor, which is not included. That caveat belongs next to the price every time. What you get is genuinely a lot: 18-gauge brads from 3/8 in. to 2 in., a 106-nail quick-release magazine, a depth adjustment wheel, a rotatable exhaust, a nose latch for clearing jams, a carrying case and 2,000 nails (500 each of 3/8 in., 3/4 in., 1 in. and 2 in.). It runs on 60 to 115 PSI through a 1/4 in. NPT inlet.
For the full field of 18-gauge options, cordless and pneumatic, with the published specs side by side, see our guide to the best brad nailers for DIY.
Where does a nailer sit in the buying order? After the drill/driver and after a saw — a fourth or fifth cordless purchase, not a first one, and our list of must-have cordless power tools covers what comes before it.
Brad nailer or finish nailer?
Here is the short version: a brad nailer is for trim that only needs to stay still; a finish nailer is for trim that has to hold. Both drive thin, small-headed nails that you fill and paint over. The difference is the thickness of the wire, and thickness is holding power.
An 18-gauge brad is a thin fastener with a tiny head. It is kind to delicate stock, it rarely splits a thin return, and the hole it leaves almost disappears under one pass of filler. A 16-gauge finish nail is noticeably thicker, grips far harder, and leaves a hole you will actually have to fill properly.
Most buying guides put the dividing line at around 1/2 inch of stock thickness — 18-gauge below it, 16-gauge above — and Lowe's own guidance is simply that brad nails are for thin wood, finish nails for thicker wood. Fine Homebuilding is more specific: baseboards, chair rails and crown moulding are 16-gauge territory; smaller trims like casing and quarter-round are 18-gauge. Quarter round, shoe moulding, panel moulding, cabinet backs, small boxes: brad. Three-quarter-inch baseboard, door casing, chair rail, anything that gets kicked, leaned on or vacuumed into weekly: finish.
Pro Tool Reviews makes the same point from the other direction: brad nails are thin enough to bend with your fingers, which makes them unsuitable for projects where strength is required. Shooting two brads per stud instead of one is a workaround DIY guides commonly suggest, though we have not found a published test behind it. If you find yourself doing that on every stud, you have bought the wrong gauge for the job.
We have written the full comparison, including why the naming in this category is such a mess, in the difference between a brad nailer and a finish nailer.
Finish nailer: trim, casing and crown
The 16-gauge finish nailer is the tool that makes trim work look professional, because it is the one that holds. A brad will tack baseboard to a wall; a 16-gauge nail will keep it there through a decade of vacuum cleaners.

Metabo HPT NT65M2S
The 16-gauge step up for baseboard, casing and chair rail, with a switch that lets you lock the trigger into the safer sequential mode.
Pros
- Drives 16-gauge finish nails from 1 in. up to 2-1/2 in.
- Selective actuation switch — choose sequential fire or bump fire
- Tool-free depth of drive, no-mar nose tip and a 360-degree adjustable exhaust
- Covered by the Metabo HPT Professional 5-Year Tool Warranty
Cons
- Requires a separate air compressor, which is not included
- A 16-gauge nail is more fastener than thin, delicate trim wants
The Metabo HPT NT65M2S is the step up we would buy, at $109.00 as of November 2026. It drives 16-gauge finish nails from 1 in. up to 2-1/2 in., weighs 3.7 lbs, and has a selective actuation switch — you choose sequential fire or bump fire rather than letting the tool choose. That switch is the most important control on this gun, and we come back to it in the safety section below. It also has tool-free depth of drive, a 360-degree adjustable exhaust port, an air duster button and a no-mar nose tip so the gun does not dent the trim it is fastening. It carries the Metabo HPT Professional 5-Year Tool Warranty, and its listing states it was rated Pro Preferred Nailer for 12 years running, 2014 to 2025, by Builder and Developer Magazine.
Like the cheaper WEN, it is pneumatic: it requires a separate air compressor, which is not included. Factor that in before comparing its sticker price with a cordless tool's.
One thing worth planning for: trim gets cut before it gets fastened, and a finish nailer is a frustrating tool to own if your cuts are not tight. These two purchases belong together, which is why our guide to the best miter saws for DIY is the companion piece to this section. A clean 45 and a 16-gauge nail is the whole trick.
Our dedicated round-up of the best finish nailers for trim weighs cordless 16-gauge tools against pneumatic ones. Of the pneumatic options, the NT65M2S is the one we would spend our own money on.
Staple guns and upholstery work
This is the pick that does not belong on a nail gun page, and that is the point.

Arrow T50
Not a nail gun at all — a hand-squeezed staple gun. It is here because a lot of what people buy a nailer for is actually staple work.
Pros
- Takes Arrow T50 staples in 1/4 in., 5/16 in., 3/8 in., 1/2 in. and 9/16 in.
- Chromed-steel body with steel parts hardened in a 1,500-degree furnace, per the listing
- High-leverage handle, rear-load magazine and a staple-viewing window
- Covers insulation, upholstery, screening, general repairs and craft work
Cons
- Manual and hand-squeezed, so it is slow and tiring over a big job
- Drives staples only — never brads or finish nails
- Staples are sold separately
The Arrow T50 is a manual staple gun — hand-squeezed, no battery, no air, and not a nailer. It does not drive brads and it does not drive finish nails. It takes Arrow T50 staples in 1/4 in., 5/16 in., 3/8 in., 1/2 in. and 9/16 in., sold separately, and it costs $19.95 as of November 2026.
It is here because a surprising share of what people buy a nail gun for is actually staple work. Stapling insulation batts between studs. Re-covering a dining chair seat. Tacking window screening into its frame. Fastening landscape fabric, holding a loose carpet edge, backing a craft project. A brad through fabric or kraft facing does nothing useful; a staple's two legs and its bridge are what hold soft material against wood.
For that work, a chromed-steel hand stapler with a high-leverage handle, a rear-load magazine and a staple-viewing window does the job for the price of lunch. Per the listing, its steel parts are hardened in a 1,500-degree furnace. The honest limitation is effort: squeezing a few hundred staples by hand is tiring, and if you are stapling a whole attic you want a powered stapler instead.
Where it fits against powered options — electric staplers, pneumatic crown staplers, and brad nailers that also fire narrow-crown staples — is the subject of our round-up of the best staple guns for DIY.
Cordless, pneumatic or gas?
There are three ways to put energy into a nail, and the choice matters more than the brand on the tool.
Cordless nailers carry a battery and either a sealed air spring or a flywheel. The appeal is obvious: no compressor, no hose, no noise until you pull the trigger, and the tool is usable fifteen seconds after you pick it up. The costs are weight in the hand, a higher price for the same fastener, and a battery platform you are now married to. That last point is not trivial: if you already own batteries on a platform, a bare tool is the cheapest upgrade available to you, and a complete kit on a different platform means another charger on the shelf. Our guide to cordless tool batteries explains how the platforms differ and why an amp-hour rating is not a quality rating.
Pneumatic nailers are lighter, cheaper and simpler, because the expensive part of the system lives on the floor instead of in your hand — the WEN 61723K at $39.16 is the whole argument in one price. The costs are a hose that catches on everything, a compressor to drag out and plug in, and a motor cycling behind you. For a day of trim in one room, pneumatic is pleasant. For twenty minutes upstairs, it is a chore.
Gas nailers — fuel-cell tools, where a battery fires a spark that ignites a disposable fuel cartridge — are mostly a framing-crew answer, and none of our picks are gas tools. We would not send a homeowner down that route when cordless covers the same ground without consumable cartridges.
This is the same trade-off that runs through every power tool category, and our broader piece on corded vs cordless power tools is the general version of the argument. The nailer-specific version, with the price and weight figures laid side by side, is cordless versus pneumatic nailers.
Our rule of thumb: one gun, no compressor, go cordless. Several guns, or a compressor already in the garage, go pneumatic.
Do you need an air compressor?
This is the question that decides your whole purchase, so let us do the arithmetic properly.
The complete cordless gun is $108.00. The pneumatic gun is $39.16. The gap is $68.84 as of November 2026, and it is the most useful number on this page — because $68.84 does not buy you an air compressor. Not a new one worth owning, not with a hose and fittings. So for a single nail gun the cordless route is cheaper all-in, even though its sticker is nearly three times as much ($108.00 is 2.8 times $39.16). The $39.16 tool is only the cheap option if the compressor is already in your garage.
We are not going to quote you a standalone compressor price. The only one we have verified is the kit below, and that figure covers the whole kit, so any number from us would be a guess.
The pneumatic route starts winning the moment you want more than one gun, because a compressor is a fixed cost every air tool afterwards shares: a second nailer, a blow gun, a tyre inflator, a crown stapler. That is precisely the shape of the next pick.

CRAFTSMAN 4-Tool Combo
A 6-gallon pancake compressor packaged with three nailers — 16GA finish, 18GA brad and 23GA pin — plus a 25-ft hose. The route that only makes sense once you want more than one gun.
Pros
- Three nailers (16GA finish, 18GA brad, 23GA pin) plus the compressor and a 25-ft air hose
- 150 PSI maximum pressure and 2.6 SCFM at 90 PSI
- Oil-free motor with a low-voltage start and dual quick couplers
Cons
- 30.8 lbs of compressor to lift, roll out and store
- Warranty runs 1 year on the compressor but only 6 months on the included air tools and accessories
- Much more money up front than a single brad nailer
The CRAFTSMAN combo is $329.97 as of November 2026, and it is worth being exact about the contents, because the listing's own name invites a miscount. It is sold as a "4-Tool Combo Kit" and it contains three nailers — 16GA finish, 18GA brad and 23GA pin — plus the 6-gallon pancake compressor and a 25-ft air hose. Three guns, not four.
The compressor is rated to 150 PSI maximum with 2.6 SCFM at 90 PSI, runs an oil-free motor with a low-voltage start, has dual quick couplers and an iron body with a carry handle, and weighs 30.8 lbs. For context, according to Global Industrial's listing for DEWALT's 6-gallon pancake combo kit, that unit is rated 0.9 HP and 2.6 CFM, and the Bostitch 6-gallon pancake beside it is quoted at the same 2.6 CFM at 90 PSI — the figure CRAFTSMAN publishes here, which suggests 2.6 SCFM at 90 PSI is typical for a 6-gallon pancake rather than a weak spot. Trim nailers fire intermittently, so a tank that size keeps up with one person.
Two honest caveats: 30.8 lbs is real equipment to store and move, and the warranty is asymmetric — 1 year on the compressor but only 6 months on the included air tools and accessories. If you want one good gun, buy the cordless brad nailer. If you want a small air system and three gauges to choose from, this box is the efficient way there.
The full version of this decision, including when renting a compressor beats buying one, is whether you need an air compressor for a nail gun.
Nail sizes, gauges and what to load
Gauge is wire thickness, and the numbering is backwards from intuition: a lower gauge number means a thicker nail. A 23-gauge pin is the thinnest, then 18-gauge brads, then 16-gauge finish nails, then 15-gauge. Framing nails are thicker still and usually described by length and head type rather than gauge.
Two rules get you most of the way. First, the common rule of thumb is to get at least an inch of nail into the framing or substrate behind the piece you are fastening. Second, it should be short enough that it does not come out the other side — into a wire, a pipe, or a finished surface in the next room. For 1/2 in. shoe moulding into a baseboard, a 1 in. to 1-1/4 in. brad is plenty. For 3/4 in. baseboard through 1/2 in. drywall into a stud, do the sum: that is 1-1/4 in. of material in front of the framing, so a 2 in. nail leaves only 3/4 in. in the stud while a 2-1/2 in. 16-gauge nail leaves 1-1/4 in. That is why baseboard wants 16-gauge at the long end of its range.
What our picks will actually take, individually — these ranges genuinely differ, so do not assume:
According to Fine Homebuilding's guide to choosing nails for carpentry and woodworking, fastener choice comes down to matching the nail to the job: it is dictated by the size of the workpiece and where the fastener sits, with smaller or more visible work taking smaller fasteners and larger or hidden work taking larger ones. That is as true of a nailer's collated strips as it is of loose nails — buying the wrong box of 18-gauge brads is a cheap mistake, but it is still a trip back to the store.
A note on collation: brads and finish nails come glued or paper-taped into strips, and strips are not universal across brands or angles. Check gauge, length and strip style against your tool's manual before buying in bulk. The deeper version, with a length chart per material, is what size nails to use for trim and baseboard.
Running a nail gun safely
Trigger type is the whole ballgame, and the evidence here is unusually good. According to the joint NIOSH and OSHA guide Nail Gun Safety: A Guide for Construction Contractors, the risk of a nail gun injury is twice as high with a multi-shot contact trigger as with a single-shot sequential trigger. The mechanical difference, per that guide: a full sequential trigger fires only when the safety tip and the trigger are activated in order, while a contact trigger fires when the two are activated in any order — which is what lets a gun double-fire, or fire when its nose bumps something you did not intend to nail.
A 2015 study by Lipscomb, Nolan and Patterson in the CDC's research archive found acute injury risk 70% higher with contact-trip triggers, and found musculoskeletal risk comparable between the two trigger types — so the argument that sequential firing is harder on your body does not hold up.
So: set your gun to sequential fire and leave it there. On the Metabo HPT NT65M2S that is the selective actuation switch. And wear glasses — the Power Tool Institute's reference guide to power tool safety says eye protection should meet ANSI Z87.1 (USA) or CSA Z94.3 (Canada) and that compliant products carry that marking, and its general safety guidance adds that you should refer to the tool's operator's manual for the specific eye protection recommended. Our full treatment of nail gun safety covers trigger modes, hand placement and the hazards specific to each nailer family.
Learning to drive a nail properly
A nailer is not a point-and-shoot tool, and the first ten minutes with a new one should be spent on offcuts rather than on the trim you just paid for.
Set the depth of drive on scrap first. Nearly every trim nailer has an adjustment — tool-free on the Metabo HPT NT65M2S, a depth wheel on the WEN 61723K — and the right setting leaves the head just below the surface, shallow enough that one pass of filler covers it. Too shallow and you are tapping heads flush by hand; too deep and you have blown a crater through the face of the moulding. Pine, poplar, oak and MDF all want different depths, so test on the same material.
Hold the nose flat and square. A nailer fired at an angle drives the nail at an angle, which is how brads come punching out of the face of a piece of trim half an inch below where you aimed. Press firmly enough to compress the nose safety fully, and let the gun do the work rather than leaning on it.
Know where your other hand is. A nail that hits a knot or a previous nail can deflect sideways in a way no amount of care predicts, so keep the free hand well clear of the firing line — not an inch from the nose.
Nail into something solid. Trim fastened into drywall alone will loosen. Find the studs first and mark them where the trim will cover the marks. Because 18-gauge brads hold less than 16-gauge nails, many DIY guides suggest shooting two brads per stud instead of one — a fair workaround, and a signal to switch gauges if you need it everywhere.
Use the no-mar tip. It exists so that pressing a steel nose into finished trim does not leave a ring of dents around every nail. The dents are permanent; replacement tips are not expensive.
A step-by-step walkthrough, from loading a strip to setting the last nail in a mitre, is in how to use a nail gun.
When the gun stops firing
It will happen, usually in the middle of a run, and it is almost never the tool dying. Work through the cheap causes first.
It is empty. Magazines run out quietly, and a dry-firing gun makes a convincing noise while driving nothing. Check the magazine before anything else — the WEN 20512's LED indicator reports magazine fill for exactly this reason.
The battery is low, not dead. Cordless nailers often weaken before they stop, and nails that no longer sink fully are the classic early sign. Swap the pack before you touch the depth setting, or you will set depth for a tired battery and blow holes through your trim once it is charged.
The air pressure has dropped. On a pneumatic gun, a compressor that has not caught up, a kinked hose or a leaking coupler will all show up as weak or absent firing. The WEN 61723K wants 60 to 115 PSI; below the bottom of that band it will not drive properly. Listen for the motor cycling and check the regulator before blaming the gun.
There is a jam. A bent nail or a mis-fed strip stops everything. Disconnect the air or remove the battery first — not after — then open the nose. The WEN 61723K has a nose latch specifically for clearing jams without tools; most trim nailers have some version of it.
The strip is wrong or badly loaded. A strip that is the wrong gauge, the wrong collation or seated backwards will feed intermittently or not at all. Pull it out and reseat it.
It is cold. Tools left in an unheated garage overnight fire poorly until they warm up, and batteries feel it most.
If none of that fixes it, the deeper diagnostic sequence — driver blade, O-rings, trigger valve, dry-fire lockout — is covered in why a nail gun stops firing.
Frequently asked questions
Do I need a compressor for a nail gun?
Only if you buy a pneumatic one. Cordless nailers like the WEN 20512 need no compressor, no hose and no fittings. The cheaper WEN 61723K at $39.16 does require a separate air compressor, which is not included — and the $68.84 gap between those two prices does not cover buying one, so for a single gun the cordless route is cheaper all-in.
What nail gun should a beginner buy?
An 18-gauge cordless brad nailer, and ideally one that ships complete with a battery and charger. It covers light trim, moulding, cabinet backs and shop projects, it is the most forgiving gauge to learn on because it rarely splits thin stock, and there is no second purchase standing between you and your first nail.
Can one nail gun do trim and framing?
No. They are different tools driving different fasteners, and the gap is not a matter of degree. A 16-gauge finish nail holds baseboard; structural framing uses much heavier nails. Trim nailers cannot drive them. If you are framing a wall, rent or buy a framing nailer and follow the nailing schedule in the building code covering your area — Fine Homebuilding notes that model codes specify the size, spacing and number of nails for each connection.
Is a brad nailer or a finish nailer better for baseboard?
A finish nailer, in almost every case. Most buying guides put the dividing line at around 1/2 inch of stock thickness, and Fine Homebuilding places baseboards squarely in 16-gauge territory — standard 3/4 in. baseboard is well over that line. A brad will hold tall baseboard temporarily, but it is the wrong fastener for something that gets kicked and vacuumed for a decade. The Metabo HPT NT65M2S is our 16-gauge pick.
Can you use a nail gun on hardwood?
Yes, with two adjustments. Increase the depth-of-drive setting, because oak and maple resist a nail far more than pine does, and test on an offcut of the same species first. And consider stepping up a gauge: an 18-gauge brad can bend or fail to sink in dense hardwood where a 16-gauge nail goes in straight. Near an end-grain edge, pre-drilling is still the right answer, nailer or not.
Explore the full series
- The Best Brad Nailers for DIY (2026) — Why an 18-gauge brad nailer is the one nail gun to own first, and what separates a $99 bare tool from a $279 kit.
- Brad Nailer vs Finish Nailer: Which One Do You Need? — Gauge, holding power and hole size decoded, and why most DIY trim work only ever needs the smaller gun.
- Types of Nail Guns Explained: Which One Do You Actually Need? — Six nail gun families, what each is genuinely for, and the two most DIYers ever actually buy.
- Do You Need an Air Compressor for a Nail Gun? — The real cost of going pneumatic, what CFM and PSI actually mean for a brad nailer, and when cordless wins outright.
- Cordless vs Pneumatic Nailers: Which Should a DIYer Buy? — Cost of entry, weight, ramp-up time and where each one stops making sense for a homeowner.
- The Best Finish Nailers for Trim and Baseboard (2026) — When 16-gauge is the right call over 18, and the angled-magazine detail that decides whether you can reach the cut.
About the Author
Cheryl Thompson
Cheryl Thompson is the tools editor at The DIY Tool Review. A lifelong fixer and self-confessed tool addict, she has spent years buying, borrowing and wearing out hand and power tools across home renovation, furniture building and everyday repairs. She writes hands-on, no-nonsense reviews to help fellow DIYers spend their money on the tools that actually last.