The Best Measuring and Layout Tools for DIY (2026 Buyer's Guide)
Six tools cover almost every layout job in a house: a 25-foot tape, a speed square, a torpedo level, a combination square, a multi-sensor stud finder and a self-leveling laser. Here is what each one is for, what it costs, and where accuracy actually gets lost.

- Category
- Measuring & Layout
- Tools tested
- 6
- Read time
- 25 min
- Updated
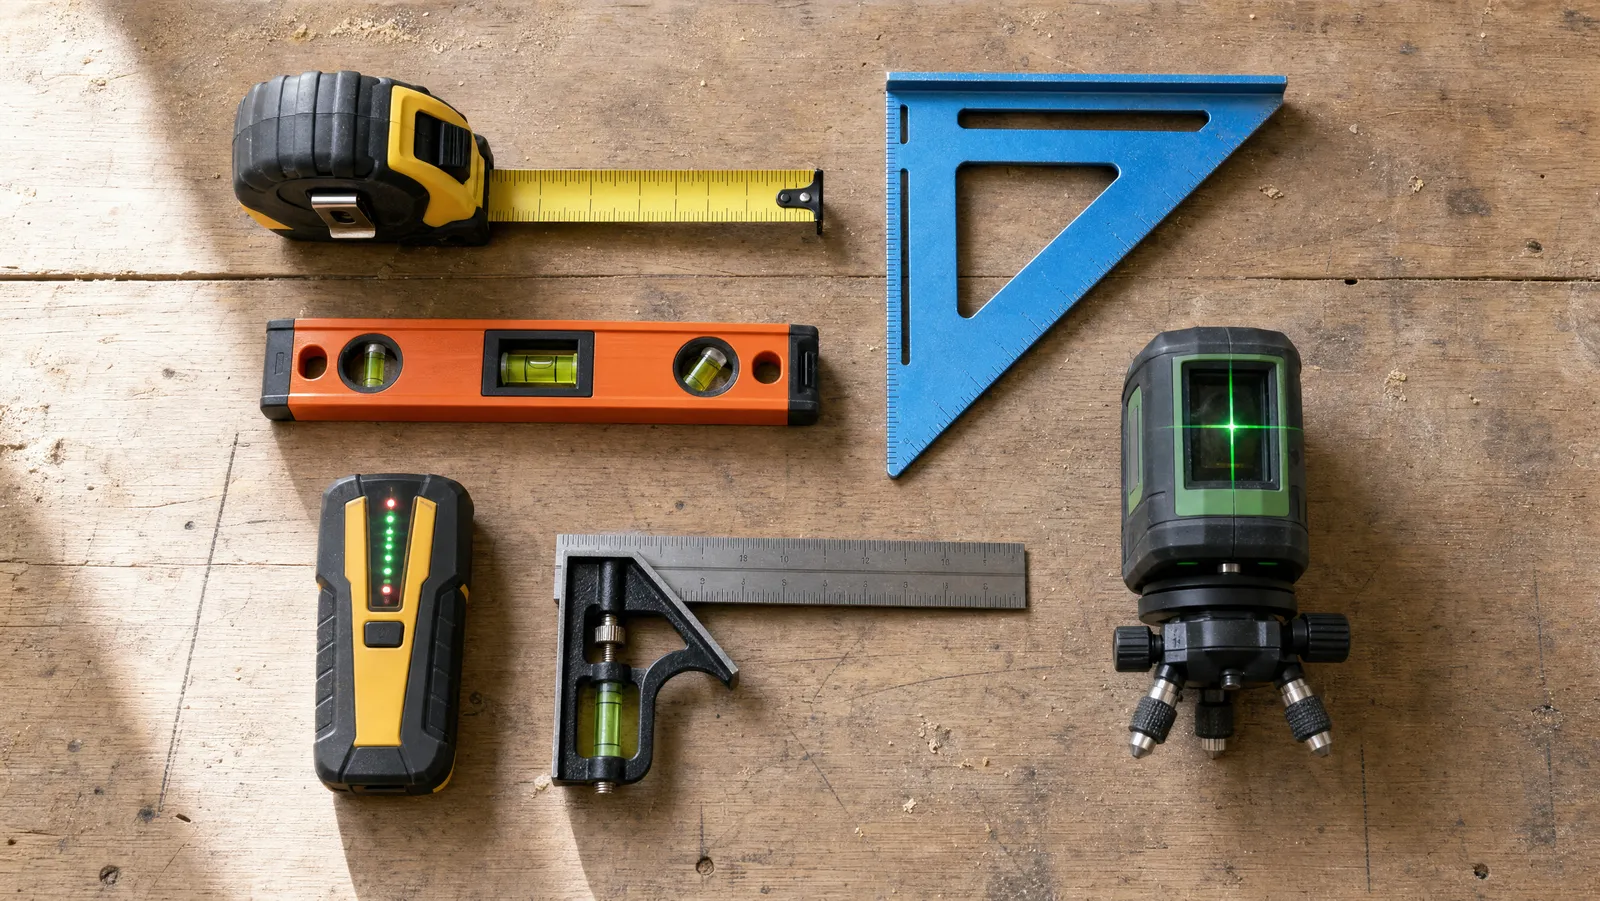
The best measuring and layout tools for a home DIYer are a 25-foot tape, a speed square, a torpedo level, a combination square, a multi-sensor stud finder and a self-leveling laser. That is six tools, under $200 for all of them as of August 2026, and between them they lay out almost every job a house will ever ask of you.
This is the hub page for everything we publish about measuring, marking and layout: a complete buying guide on its own, pointing to the deeper articles as they land. If you are still assembling a first kit, our roundup of essential DIY tools is the wider view; this page is the part of that kit that decides whether anything you build fits.
How we picked
We do not hands-on test tools, and we are not going to pretend otherwise. Every pick below is selected on published manufacturer specifications, current price and availability, and on how the tool fits the way a DIYer actually works. If we say a level has four vials or a stud finder has nine sensors, that is the maker's own published figure and we say whose.
We also cannot publish star ratings or review counts, because our product data source does not supply them. You will not find a rating anywhere on this page.
Prices are as of August 2026 and they move constantly. Treat every figure as a snapshot and check before you buy. One more filter: we favoured tools that do more than one job, because layout is a category where a $10 aluminium triangle genuinely competes with a $50 electronic device.
Accuracy is a chain, and you are usually the weak link
Here is the idea that organises this whole page. Measurement accuracy is a chain: the tool, the mark, the cut, and the person doing all three. The chain is only as good as its worst link, and in a home workshop the worst link is almost never the tool.
Consider the numbers. A carpenter's pencil lays down a line that can easily be a sixteenth of an inch wide. Mark on one side of it, cut down the middle, repeat six times across a bookcase, and you have introduced more error than any tool here contributes. The laser level below is specified by Motovera at +/-1/9 in at 33 ft — roughly a tenth of an inch across a large room.
So the expensive fix is rarely the right one. Buying a more accurate tool when your marking is the problem is like buying a sharper knife to fix a bad recipe. We would rather you spent $10 on a mechanical pencil and a marking knife than $200 on a better laser.
What the tools below actually buy you is not precision so much as repeatability and speed — the ability to get the same answer twice, alone, without a helper holding the other end of a tape.
The six tools that cover almost everything
Buy them roughly in this order. A tape is useless without something to mark against, a square is useless without a tape, and the laser only earns its price when jobs get bigger than your arm span.
Prices move, so that column is a snapshot rather than a promise. Now the detail.
The tape measure: Stanley FatMax 25 ft 2-Pack

Stanley FatMax 25 ft 2-Pack
Stanley lists an 11-foot standout plus 16-inch and 19.2-inch stud centre markings, blade armour on the first 3 inches and a Mylar film over the rest. Two in the box.
Pros
- 11-foot standout reaches across a room unsupported
- 16 in and 19.2 in stud centre marks built into the blade
- Blade armour coating on the high-wear first 3 inches
- Two tapes - keep one in the car
Cons
- Bulkier in the pocket than a 16 ft tape
- You are paying for two
Everything starts here. Stanley lists an 11-foot standout — the distance the blade extends unsupported before it folds — plus 16-inch and 19.2-inch stud centre markings, blade armour over the first 3 inches and a Mylar film over the rest of the blade.
Standout is the specification that changes how you work. Eleven feet is more than the width of most rooms, which means you can hook one wall, walk the case to the other and read the number without a second person or a sagging blade. The first 3 inches take the abuse in any tape, hence the armour there.
The 16-inch marks matter because they match how houses are built. The 2024 International Residential Code sets stud size, height and spacing in Table R602.3(5), and as Jaspector's summary of Section R602.3 puts it, 16 inches on centre is the standard for load-bearing walls, with 24 inches permitted on the top storey or in single-storey structures where wall height, load and stud size meet that table's conditions. The 19.2-inch marks are simply 96 divided by 5 — five joists under an 8-foot sheet.
The tradeoffs are honest: a 25-foot FatMax is bulkier in a pocket than a 16-foot tape, and you are paying for two. Two is the point. One lives in the toolbox, one in the car, and neither is the one you left in the loft. For the technique that goes with the tool, read how to use a tape measure like a pro.
The speed square: Swanson S0101 7 in

Swanson S0101 7 in
The layout tool that does five jobs: try square, mitre square, saw guide, line scriber and protractor. Made in the USA since 1925 and ships with the pocket Blue Book of rafter tables.
Pros
- Five tools in one piece of aluminium
- Doubles as a circular-saw fence for square crosscuts
- Scribing notches at 1/4 in spacing
- Under ten dollars
Cons
- 7-inch size is too small to guide long cuts
- Rafter tables have a learning curve
Ten dollars for five tools. The Swanson S0101 works as a try square, a mitre square, a saw guide, a line scriber and a protractor, it has been made in the USA since 1925, and it ships with the pocket Blue Book of rafter tables.
The job that justifies it on its own is the saw guide. Hold the lipped edge against the board, run your circular saw's shoe along the square, and you get a square crosscut without measuring an offset. The scribing notches at 1/4 in spacing let you drag a pencil down a board for a consistent rip line.
The limits are real. Seven inches is too short to guide a long cut — it will square a 2x4 or a 1x6 and it will start a cut across a wider board, but it cannot fence a full crosscut in a 12-inch shelf. And the rafter tables on the back are genuinely useful once learned and completely opaque before that.
The square set: Swanson S0101CB Pack

Swanson S0101CB Pack
The 7-inch Speed Square plus a 6-inch combination square with a die-cast zinc head and a built-in level vial, and the 60-page Blue Book.
Pros
- Covers both square types in one purchase
- Combination square head slides for depth and marking
- Built-in vial on the combination square
- 60-page Blue Book included
Cons
- Combination square is 6 in - short for wide boards
- Duplicate speed square if you already own one
If you do not already own a speed square, buy this instead of the one above. It is the same 7-inch Speed Square plus a 6-inch combination square with a die-cast zinc head and a built-in level vial, and the full 60-page Blue Book.
The combination square is the underrated one. Its head slides on the rule, so it sets and repeats a depth: lock it at 3/8 in, run it along a board edge with a pencil at the end of the rule, and you have a consistent line down the whole length. That is how hinge mortises, screw lines and rabbets get laid out without measuring each one.
Two catches. The combination square is 6 inches, which is short for wide boards — a 12-inch model is a better shop tool if you work with cabinet-grade panels. And if you already own a speed square, this pack duplicates it, at which point a standalone combination square is the cheaper route.
The torpedo level: Klein 935AB4V

Klein 935AB4V
Billet aluminium with vials at level, 90, 45 and 30 degrees, a patented magnet track that stops the rare-earth magnets falling out, and a V-groove that sits on pipe and conduit.
Pros
- Four vials including 30 and 45 degrees
- Patented magnet track keeps magnets in place
- V-groove seats properly on round stock
- Top-view windows readable from above
Cons
- 6 inches is too short for door and shelf work
- Pricier than a basic bubble level
The level you actually reach for. Klein lists billet aluminium construction, vials at level, 90, 45 and 30 degrees, a patented magnet track designed to stop the rare-earth magnets falling out, a V-groove that seats on pipe and conduit, and top-view windows so you can read it from above.
Two of those are worth paying for. The magnet track addresses a specific failure — cheap magnetic levels lose their magnets, usually into a wall cavity. And the V-groove is the difference between a level that balances on a pipe and one that sits on it.
The honest catch is size. Six inches is a spot check, not a layout tool. It will tell you a shelf bracket is level and a box is plumb; it will not tell you a 32-inch shelf or a door frame is true, because a short level samples a short section and extrapolates. For anything longer than a foot you need a longer level or a laser, which is the next section.
The stud finder: Franklin ProSensor M150

Franklin ProSensor M150
Nine sensors light the whole stud at once rather than beeping at one edge. Franklin lists 1-1/2 in detection through drywall, no calibration, and live wire detection.
Pros
- Shows the full stud width in one pass
- No calibration - can start over a stud
- Handles doubles and irregular framing
- Live wire detection
Cons
- Costs several times a basic edge finder
- Not compatible with rechargeable batteries per Franklin
Most stud finders beep at an edge and leave you to work out the middle. The Franklin ProSensor M150 uses nine sensors and lights the whole width of the stud at once. Franklin lists detection to 1-1/2 in through drywall, no calibration, and live wire detection.
The "no calibration" part is the one that changes the experience. Single-sensor finders have to be zeroed on empty wall before each sweep, so if you happen to start over a stud, the tool calibrates itself to wrong and quietly lies to you. A multi-sensor array does not have that failure mode — you can start anywhere, including directly over a stud, and it reads the whole strip of wall in one pass.
The costs: it is several times the price of a basic edge finder, and Franklin states it is not compatible with rechargeable batteries, so keep alkalines in it. For anyone who has drilled two holes into nothing before finding framing, both are easy to accept.
The laser level: Motovera 100ft Green + Tripod
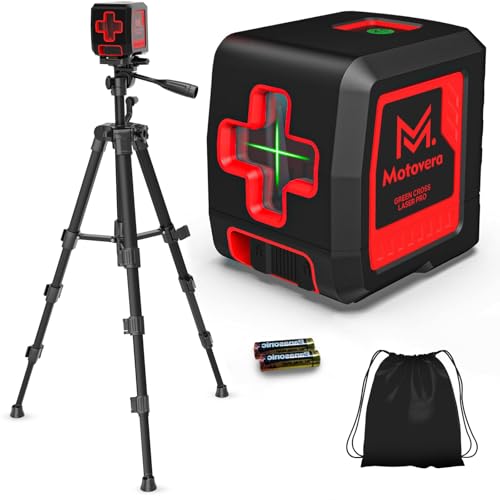
Motovera 100ft Green + Tripod
The point where a laser stops being a luxury. Motovera lists +/-1/9 in accuracy at 33 ft, a green beam visible to 100 ft indoors, self-leveling within +/-4 degrees, and a tripod in the box.
Pros
- Tripod included - genuinely ready to use
- Green beam far easier to see than red
- Self-leveling and manual modes
- IP54 rated
Cons
- Needs a receiver (not included) for bright outdoor work
- AA batteries rather than rechargeable
This is where a laser stops being a luxury. Motovera lists +/-1/9 in accuracy at 33 ft, a green cross-line beam it says is visible to 100 ft indoors, self-leveling within +/-4 degrees, an IP54 rating, and a tripod in the box.
The tripod is not a detail. A laser without a mount is a laser you balance on a paint tin, and buying one afterwards costs real money. Included, it means the box you open is a working setup.
Two flags. It needs a receiver for bright outdoor work, and the receiver is not included — a green beam is easy to see across a room and hard to see across a sunny yard. And it runs on AA batteries rather than a rechargeable pack, which is cheap to feed but means keeping spares.
Levels: from torpedo to laser
A level answers exactly one question — is this line true? — and what separates a $10 torpedo from a $200 laser is how long a line it can answer for, and whether you need a second pair of hands.
Deciding whether you want a laser level or a spirit level is a question of span and solitude. A spirit level is a contact tool: it must touch the thing being checked, so its useful length is its actual length. A laser projects a reference across the whole room and holds it there while you work, which is why it lets one person hang a run of cabinets.
Three lengths cover the bubble side, and when we work through the best levels for DIY in a dedicated guide, the same three come up: a 6-to-9-inch torpedo for spot checks and pipe, a 24-inch for cabinets, shelves and appliances, and a 48-inch for doors and anything needing a long straight reference.
What laser accuracy specs actually mean
Read them carefully, because they are conditional. According to ID Times, a spec such as +/-1/8 in at 30 ft means the tool stays within an eighth of an inch at thirty feet under the conditions the manufacturer used to generate the number — it does not mean the tool is accurate to an eighth of an inch, full stop. According to RayXact's guide to laser level tolerances, those figures come from lab testing on a stable bench at a controlled temperature with the unit centred in its self-leveling range, while real-world distance, temperature and mounting all add error on top; RayXact also notes that error grows in direct proportion past the stated distance, so doubling the range roughly doubles the potential deviation.
Apply that to the Motovera. Motovera's stated +/-1/9 in at 33 ft, scaled proportionally in the way RayXact describes, works out to somewhere around four hundredths of an inch across a 12-foot wall. That is far tighter than your pencil line. At two or three times the distance the error grows with it, which is why long runs deserve a check rather than blind faith.
Green versus red
The question of green versus red laser beams comes down to the human eye rather than the laser. According to Pacific Laser Systems, our sensitivity to light peaks at roughly 555 nanometres and falls off sharply within about 50 nanometres of that, which puts a green beam near 532 nm much closer to peak sensitivity than a red one near 635 nm. The practical consequence is that a green line looks brighter at the same output power, so you can see it further across a lit room.
The costs are real: according to Huepar's red-versus-green comparison, green diodes draw more power, which shortens runtime, and green tools generally carry a higher price than the equivalent red ones. For indoor DIY we still think green is worth it — seeing the line without dimming the lights is most of the value of owning a laser.
If you want the full comparison of self-leveling ranges, mounting options and what to spend, we go deeper in our guide to the best laser level for home use.
Finding what is behind the wall
Layout stops at the wall surface. Everything structural you will ever hang — a TV bracket, a heavy shelf, a handrail, a cabinet rail — has to land in framing, and finding that framing is its own tool category.
Most electronic finders work on capacitance. According to Pro Tools Guide, a capacitive sensor plate detects the change in dielectric constant as it passes over denser material: air sits around 1.0, gypsum drywall around 2.5 to 3.0, and solid structural wood between 3.0 and 4.0, and the circuitry reads that shift as a stud. Pro Tools Guide also describes the key design split — traditional single-sensor tools measure at one point, so you sweep back and forth and mark both edges to estimate the centre, while multi-sensor models use an array (commonly three to thirteen sensors depending on the model) that maps a wide strip of wall at once and lights up the actual footprint of what it finds.
That difference is why we recommend a multi-sensor tool for anyone hanging anything heavy. A single-sensor finder makes you infer the centre from two edge beeps, and gives no warning when it has found a pipe or a double stud instead.
When the tool is not the answer
Before you spend, know that you can find a stud without a stud finder, sometimes faster. Measure 16 inches from a corner and check; look for the vertical line of nail pops in the paint; tap and listen for hollow turning solid; or run a strong magnet along the wall until it grabs a drywall screw. The magnet is the most reliable of the four, because it finds actual fasteners rather than inferring density.
For the fuller treatment of sensor types, depth ratings and what actually goes wrong on lath-and-plaster walls, see our guide to the best stud finders for DIY.
Squares and marking tools
A square is the cheapest accuracy you can buy, and the one most beginners skip. Its job is not to measure but to transfer: it takes a known-true edge and projects a perpendicular from it, which is how you get a cut that closes tight instead of showing daylight at one corner.
You want two of them eventually. The speed square is the fast, rugged, one-handed tool for marking and guiding crosscuts on framing lumber and boards. The combination square is the precise one: a sliding head that locks anywhere on the rule, so it sets a repeatable depth, marks a consistent line parallel to an edge, checks a 45, and doubles as a small level and a depth gauge.
Learning how to use a speed square takes roughly ten minutes for the first three of its five functions. Hook the lipped fence over the edge of a board, mark along the perpendicular edge, and you have a square cut line — no measuring, no maths. Pivot on that fence and the degree scale gives you any angle you want. Hold the same edge and run a circular saw against it for a square crosscut. The rafter and hip-valley tables are the remaining two functions, and they can wait.
The marking tool matters more than the square
This is the part that costs almost nothing and improves every cut you make.
- A carpenter's pencil is for rough framing. Its line can be a sixteenth of an inch wide, which is often wider than the tolerance you were trying to hit.
- A 0.5 mm mechanical pencil is the everyday upgrade. It draws the same width every time, which means you can consistently cut on the same side of it.
- A marking knife beats both for joinery. A knife line severs the wood fibres rather than colouring them, which gives a chisel or saw a physical edge to drop into. It is also far easier to see in end grain.
- A scratch awl or scribe works where pencil will not — on metal, on dark hardwood, on anything glossy.
Whatever you use, adopt the crow's-foot habit: instead of a single tick that could be read a sixteenth either way, draw two short converging lines meeting at a point. The point is unambiguous. Square through it, then cut so the blade removes the line entirely.
Measuring distance: tape or laser
Putting a laser measure against a tape measure is not a contest so much as a division of labour, because the two fail in completely different directions.
A tape is contact-based, cheap, immune to weather, and works on anything you can hook or brace against. Its weaknesses are all human and all geometric: it sags over distance, it needs a second person or a wall to hook, and every reading is somebody squinting at a graduation. According to Mileseey Tools, a quality tape can be accurate to within a fraction of a millimetre on short tasks, but accuracy falls off over long distances because of bending, sagging and misalignment.
A laser distance measurer removes the human from long spans. According to EngineerSupply, most laser measurers are accurate to within 1/8 inch, with some accurate within 1/16 inch, and Mileseey Tools notes that better units hold roughly +/-1/16 in over distances up to 100 feet or more. Mileseey also flags the strengths that actually matter to a DIYer: one-person operation, near-instant readings, and built-in area, volume and indirect (Pythagorean) calculations. The catch is that they measure to a reflected surface, so Mileseey notes rain can make an accurate reading impossible outdoors and bright sun cuts the usable range.
Our position: buy the tape first and buy it twice, which is why our pick is the Stanley FatMax two-pack. A laser measure is a real convenience for estimating flooring and working alone in empty rooms, but it will not cut a board to length and it is not a first purchase.
Accuracy in practice
Owning good tools is about a third of the job. Here is the rest of it.
Measure from one datum, not from the last part. This is the single biggest source of error in DIY work. If you mark a shelf position, then measure the next one from the first, and the next from that, every small mistake carries forward and adds up. The guidance is consistent on this point: CutList Workspace recommends measuring everything from a single static reference point — a datum line, usually one edge of the board — so that an error stays isolated to the piece it happened on instead of compounding down the whole run.
Stop reading numbers when you can transfer marks instead. According to WoodnBits, the story stick method — marking heights, widths, openings and hardware positions directly onto a stick of wood, then transferring those marks to each part — eliminates cumulative error because you are no longer reading a scale, you are copying a physical position. CutList Workspace makes the same argument for what it calls relative dimensioning: when parts must be identical, measuring once and transferring is more accurate than measuring each part. In practice this means cutting one shelf, then using it as the pattern for the other four.
Use the tape's hook the way it was designed. That loose rivet at the end is not a defect. According to The Art of Manliness's tape measure guide, the hook is 1/16 in thick and slides by exactly that amount, and the first inch of blade is short by the same 1/16 in to compensate, so that the tape reads true zero whether you hook it over an outside edge (hook pulls out) or press it into an inside corner (hook pushes in). Bend it, and you have permanently biased every measurement you take.
Cut on the same side of the line, always. The saw kerf has width. Decide once that the blade eats the line and the keep piece is to the left, and never vary it. Most "it was a sixteenth short" mistakes are actually a kerf on the wrong side.
Check square with the 3-4-5 method. For anything larger than your square — a deck frame, a wall layout, a big carcass — measure 3 units along one side and 4 along the other, and the diagonal is 5 units when the corner is truly square. It scales, so 6-8-10 and 9-12-15 are more accurate over long runs. For a rectangle, the faster check is that the two diagonals are equal.
Verify tools on a schedule, not on suspicion. Run the 180-degree flip on your levels twice a year and after any drop. Check a square by marking against a known-straight edge, flipping it over and marking again from the same point — if the lines diverge, the square is out.
What to buy first
If you are starting from nothing, spend in this order and stop whenever the jobs stop. Every price below is as of August 2026 and will have moved by the time you read it.
- The tape, around $40.95 as of August 2026. Nothing else works without it. The two-pack means you always have one.
- The square set, around $24.95. Buy the pack rather than the standalone speed square, because the combination square in it is the more precise tool and the one you will keep reaching for.
- A marking pencil and a marking knife, around $10 to $20. Out of scope for our product picks, but the highest-value money on this list. A finer line is a better fit.
- The torpedo level, around $29.97. Add a 24-inch level when shelves and cabinets start appearing.
- The stud finder, around $39.97. Buy it the first time you hang something heavy, and buy the multi-sensor one.
- The laser level, around $49.99. Buy it when the jobs get bigger than your arm span: a run of cabinets, a tiled wall, a gallery wall, a fence line.
That sequence is about $186 in tools as of August 2026, before the marking gear, and it will be the least-replaced part of your kit. Squares and tapes do not become obsolete.
Common questions
Do I really need both a speed square and a combination square?
Eventually, yes, and together they cost less than most power tool accessories. The speed square is fast, rugged and lives in a tool bag; the combination square is precise, adjustable and lives on a bench. If you can only have one: combination square if you build things, speed square if you mostly cut lumber.
Is a laser level accurate enough for tiling and cabinets?
For a domestic room, comfortably. Motovera lists +/-1/9 in at 33 ft for the model above, and as RayXact explains, that tolerance scales with distance — so across a typical 12-foot wall the theoretical deviation is a small fraction of the line width you would draw with a pencil. The caveats are the ones RayXact raises: those figures come from controlled conditions, mounting and temperature add error in the real world, and the further you project, the more the number grows. Mark the line at both ends and verify with a flip before you tile.
What is the difference between a laser level and a laser measure?
They share a diode and nothing else. A laser level projects a reference line for you to build to. A laser measure returns a number: the distance from the device to a surface. A level will not tell you a room is 14 ft 3 in wide, and a measure will not give you a line to hang cabinets against. For DIY, the level is the more useful first purchase, because it replaces a helper.
Explore the full series
- The Best Laser Levels for Home Use (2026) — Six laser levels compared, and why a $30-50 green cross-line unit is the right answer for most homes.
- The Best Stud Finders for DIY (2026) — Why multi-sensor finders are a different class of tool, plus what to do about plaster and lath.
- The Best Levels for DIY: Torpedo, Box and Post Levels Compared — Why length, not brand, is the specification that decides whether a level tells you the truth.
- Laser Level vs Spirit Level: Which Do You Actually Need? — Not an either/or: what each tool physically does, and which one you should buy first.
- How to Find a Wall Stud Without a Stud Finder — Six methods ranked, starting with the magnet — plus where every one of them fails.
- How to Use a Speed Square: Every Marking It Makes — Every marking on the square explained, from the fence to the rafter scales.
- Green Beam vs Red Beam Laser Levels: What's the Difference? — Bosch sells the same laser in both colours, which isolates exactly what the green beam buys you.
- Laser Measure vs Tape Measure: Which Is More Accurate? — Which one is really more accurate, at what distance, and the mistakes that make each one wrong.
About the Author
Cheryl Thompson
Cheryl Thompson is the tools editor at The DIY Tool Review. A lifelong fixer and self-confessed tool addict, she has spent years buying, borrowing and wearing out hand and power tools across home renovation, furniture building and everyday repairs. She writes hands-on, no-nonsense reviews to help fellow DIYers spend their money on the tools that actually last.