How to Find a Stud Without a Stud Finder: 6 Methods That Work
A magnet finds the screws holding your drywall on, and those screws are in studs. Six methods ranked by how well they actually work - plus the walls where every one of them fails.

- Category
- Measuring & Layout
- Tools tested
- 3
- Read time
- 13 min
- Updated
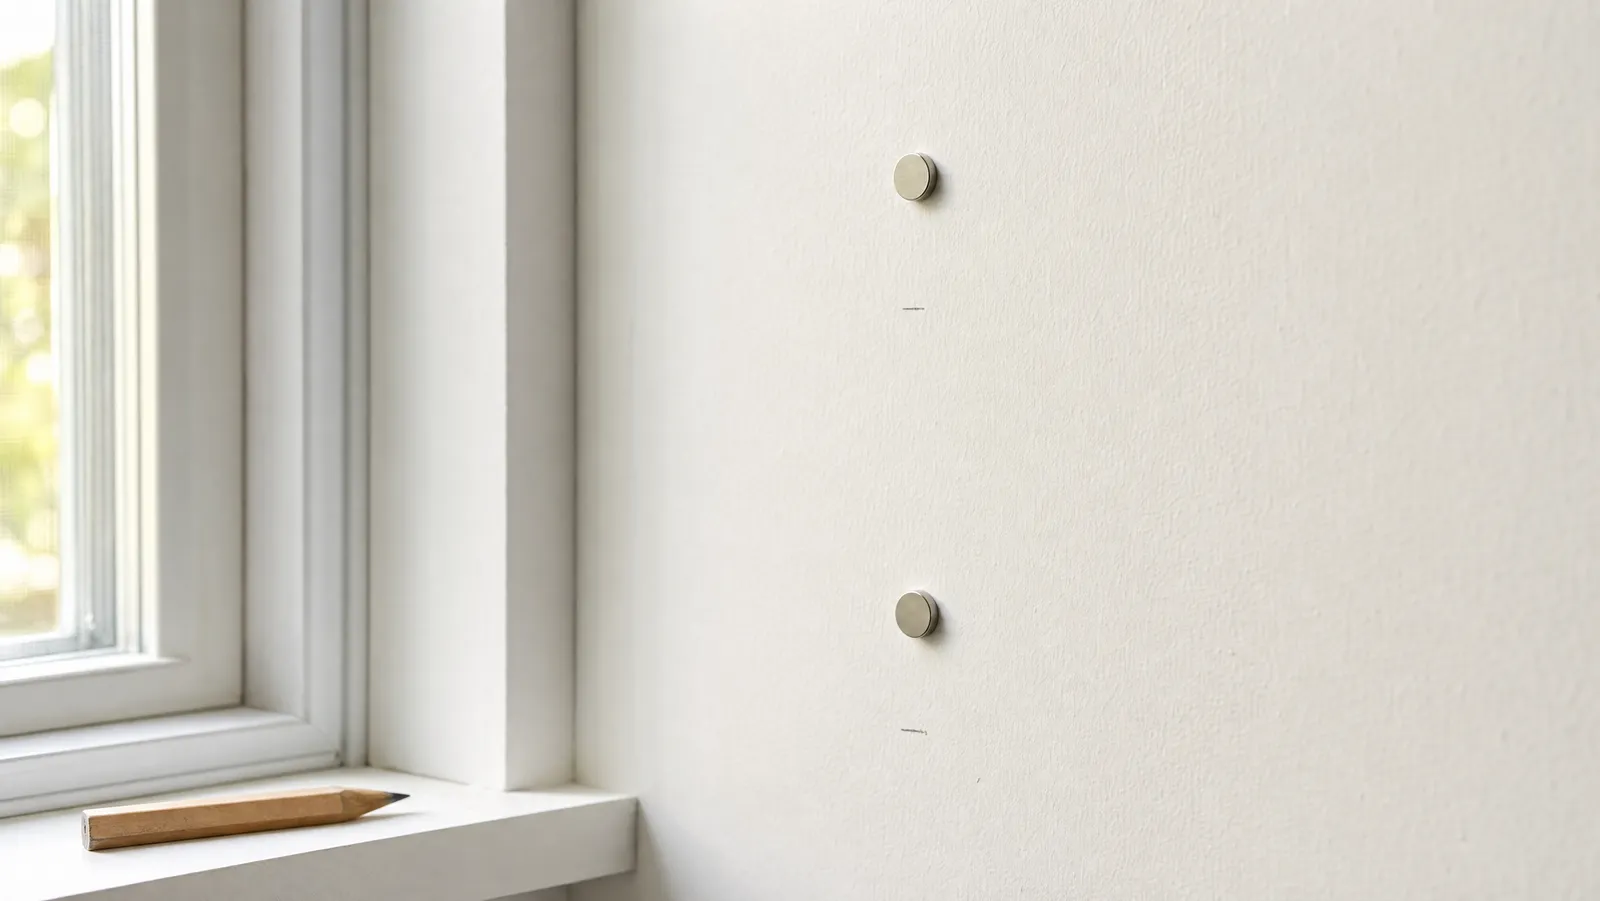
Here is how to find a stud without a stud finder, in one sentence: drag a strong magnet slowly across the wall until it sticks, because drywall is screwed to the framing with steel fasteners and the screw you have just found is sitting in a stud. Everything else on this page is confirmation, and confirmation is the part most people skip.
We spend a lot of time on measuring and layout tools for DIY, and our honest position is that an electronic stud finder is a convenience, not a necessity. Below: six methods ranked by how well they work, the walls where all six fall apart, and one rule we will not soften - never drill blind.
The fastest method to find a stud in the wall: a magnet
A magnet does not find studs; it finds the steel fasteners holding the wall covering on, and those are driven into studs. As K&J Magnetics puts it, a magnet "can't detect the wood two-by-fours, but it easily locates steel screws that hold the drywall to the studs."
You need a rare-earth magnet, not a fridge magnet. According to Stanford Magnets, neodymium magnets are known for their strength and are commonly used for stud finding, and a small neodymium magnet can supply enough force to detect screws or nails in the wall.
- Start at chest height, a foot or two clear of the corner, roughly where your bracket is going.
- Hold the magnet loosely between finger and thumb so it can pull out of your grip, or hang it from a thread.
- Sweep in a slow zig-zag. Move sideways about an inch at a time, each pass travelling three or four inches up and down. You cannot feel a weak pull at speed.
- When the magnet grabs, leave it stuck to the wall. That is fastener number one.
- Sweep straight up and straight down from that point, hunting a second fastener in the same vertical line.
- Two fasteners in a vertical line is a stud. One is a coincidence. It could be a nail plate, a pipe strap or an old picture hook.
How far apart should those two hits be? Per IRC Table R702.3.5, drywall on walls framed at 16 in on centre is fastened with screws no more than 16 in apart along each support, and the Gypsum Association's GA-216 (section 5.4) says the same: screws not more than 16 in on centre on walls where the framing is 16 in on centre, tightening to 12 in on centre where the framing is 24 in on centre. Nails on walls go tighter still, at 8 in on centre. Expect the next fastener 8 to 16 in above or below the first, not three feet away.
Method 2: measure 16 inches from something you know
This is the method everyone half-remembers. It is a prediction, not a discovery.
Sixteen inches on centre is the residential default in the US, but it is not a guarantee. Stud size, height and load are governed by IRC Table R602.3(5), and 24 in on centre is permitted for certain stud sizes, storey positions and loads. The Department of Energy's Building America programme describes advanced framing as 2x6 studs at 24 in on centre, and notes interior non-load-bearing partitions framed on 24 in centres - which is why newer builds often come in at 24 in. Older houses and DIY remodels can be neither.
- Pick a known point. An outside corner, the edge of a window or door opening, or an existing outlet box. Openings are framed with extra studs, so there is almost always timber at a window edge.
- Hook your tape and mark 16, 32 and 48 inches from that point. Most quality tapes print red numbers at those intervals for exactly this job, as we cover in how to use a tape measure like a pro.
- Take the magnet to each mark rather than trusting the number, sweeping a 4 in window either side.
- If you get nothing at 16 in, try 24 in. Nothing at either means the layout has been interrupted, which happens constantly around doors, ducts and old openings.
The catch worth flagging in bold: on centre means the middle of the stud, not its edge. A nominal 2x4 is 1.5 in thick, so the usable timber runs about 3/4 in either side of your mark. Aim for the centre, not the edge of a pencil line.
Method 3: use an outlet or switch box
Boxes get screwed or nailed to the side of a stud during framing, which makes every outlet a free clue. As Jon Eakes notes, boxes added to existing walls are also usually placed right next to a stud for solid attachment - though old-work boxes that clamp to the drywall alone will mislead you.
- Turn off the breaker and verify with a tester.
- Remove the cover plate and look at the sides of the box. The side screwed or nailed to timber is the stud side.
- Mark that side in pencil. The stud runs from roughly the box edge outward.
- Confirm with the magnet, sweeping a vertical line 1 to 2 in out from that box edge.
- Replace the cover plate before you switch the breaker back on.
Method 4: knock and listen
Rap the wall with a knuckle and move sideways in 1 in steps. Over a cavity you get a hollow, resonant note; over a stud it goes dull and short. On plain half-inch drywall in a quiet room the difference is genuinely audible.
On its own, this is the least reliable method here. Insulation deadens the hollow note, blocking makes a mid-wall section sound solid, and pipes and old repairs change the pitch. We knock to narrow a search to a six-inch window, then reach for the magnet. We would never hang a television on it.
Method 5: look for nail pops and trim fixings
The wall has already told you where the studs are, if you light it properly.
- Turn off the room lights and hold a work light or phone torch flat to the wall so the beam rakes along the surface.
- Look for shallow dimples in a vertical line. Those are filled screw heads, and a column of them is a stud.
- Look for nail pops - small bulges or cracked paint where a fastener has backed out. They only happen where there is framing.
- Check the baseboard and door casing. Trim nails go into studs and the bottom plate, so filled nail holes in baseboard usually sit on studs; measure straight up from one.
It works well on flat paint and badly on heavy texture. Seeing nothing is not evidence there are no studs.
Method 6: the pinhole test
This is the confirmation of last resort: you make a hole and see what the hole hits.
- Pick your spot inside the bracket footprint. Anything the mounting plate covers, or within an inch of the floor behind the baseboard, will never be seen. Never test in open wall.
- Use a fine finish nail or a bradawl, pushed by hand. No drill, no hammer, no force.
- Feel the depth. The nail crumbles through about half an inch of board and then either stops dead against timber or carries on into cavity.
- Move an inch left, then an inch right to find both edges, then mark the centre between them.
- Fill any visible hole with a dab of lightweight filler.
Once you have two studs marked, a level turns two dots into a line you can hang from straight - see the best levels for DIY. A speed square does the same over shorter distances - see how to use a speed square.
How to find a stud without a stud finder: the six methods ranked
Methods 2 to 5 narrow the search; methods 1 and 6 confirm. Nobody should drill on the strength of a knock.
Where every one of these methods fails
Plaster and lath. According to The Craftsman Blog, electronic finders struggle here because they detect changes in density, and traditional plaster is thick, layered and full of old patches and fasteners - which produces false positives and missed studs. Zircon puts it more precisely: plaster is forced between the lath and keys onto the back, so a glob of it reads as a change in density. Magnets are the usual workaround, since the lath is nailed to the studs, and The Craftsman Blog calls a strong rare-earth magnet one of the most reliable low-tech methods here. But the nail head is small and buried: the National Park Service's Preservation Brief 21 puts minimum plaster thickness over wood lath at about 3/4 to 7/8 in, so the pull is much weaker than through drywall. Sweep slower and expect a column of faint hits.
Metal studs. A magnet sticks to the steel stud itself, so you get a continuous vertical band rather than discrete points. Easier to find, worse to fix into: a wood screw or lag will not hold in a steel C-stud, so you need a toggle or a metal-stud anchor. GA-216 (section 8.4) screws gypsum board to steel framing on the same schedule as wood, so the fastener spacing gives you no extra clue either.
Tile, double-layer board and thick plaster. Every extra layer puts distance between magnet and fastener, and pull falls away fast with distance - K&J Magnetics is explicit that thicker material needs a stronger magnet. This is where cheap flat magnets quietly stop working and you conclude the wall is empty.
Solid walls. Plaster over brick or block has no studs at all, or only thin furring battens. If the wall feels dead everywhere and a pinhole hits masonry at half an inch, stop hunting for timber and buy a masonry anchor.
Never drill blind
Studs are not the only thing in a stud bay. Cable and pipe run through the framing, and the code that protects them assumes a certain fastener length.
According to IAEI Magazine's coverage of NEC 300.4, where cables or raceways pass through bored holes in wood framing the edge of the hole must be at least 1-1/4 in from the nearest edge of the member, and where that clearance cannot be maintained the cable must be protected by a steel plate at least 1/16 in thick. That figure exists, as guidance on nail plates explains, because typical drywall screws run 1-1/4 to 1-5/8 in long, so a wall fastener stops short of the wiring.
That protection was designed around drywall screws, not around the 3 in lag bolt in your TV bracket box, and certainly not around a spade bit. Treat it as a minimum, not a guarantee.
Habits we would not skip:
- Never drill directly above or below an outlet or switch. Cable usually runs vertically to the box.
- Set a depth stop, or wrap tape around the bit, so you cannot go deeper than the fixing needs.
- Nail plates are steel and a magnet will stick to one - another reason to require two hits in a vertical line.
- Check the other side of the wall for a kitchen or bathroom run before drilling into a shared bay.
If you decide to buy something after all
The methods above cost nothing and work. But sweeping walls by hand adds up across a whole house. If that is you, these are the three we would buy.
How we picked, because it matters: we have not tested these tools and will not pretend otherwise. Our selection is based on published manufacturer specifications, current price and availability. We do not publish star ratings or review counts - our product data source does not supply them. Every figure below is the maker's own, and we say whose. Prices are as of August 2026 and move.

StudPoP
A magnet on a moving mechanism: instead of asking you to feel a faint tug, it clicks and pops up a visible indicator when the magnet finds a fastener. StudPoP says it works on wood studs, metal studs, plaster, tile and double-layer sheetrock.
Pros
- Gives a click and a visible pop instead of a faint tug you have to feel
- No batteries at all
- The maker says it works through plaster and double-layer sheetrock
- Finds fasteners, which is the one thing magnets never get wrong
Cons
- Still finds screws, not the stud edges - you infer the rest
- All claims here are the manufacturer’s; we have no independent test data
- The listing’s attacks on rival tools are marketing, not evidence
At $13.95 as of August 2026, the StudPoP fixes the annoying part of a bare magnet: having to feel a faint tug. A moving magnet clicks and pops up a visible indicator on a fastener, and StudPoP says it works on wood studs, metal studs, plaster, tile and double-layer sheetrock. Those are the manufacturer's claims and we have no independent test data, and the listing's attacks on rival electronic tools are marketing, not evidence. It still finds screws, not stud edges.

Klein MSF100
A flat rare-earth magnet with a bubble vial, a centre notch and a bottom opening for marking, plus a felt pad so it does not scuff paint. Klein suggests hanging several on a wall at once as reference points.
Pros
- Sticks to the wall where it finds a screw and stays there as a marker
- Built-in bubble vial lines up two finds into a level reference
- Felt pad backing protects drywall and plaster
- No batteries
Cons
- Finds fasteners only, and only ferrous ones
- A bare magnet gives no width information
- Klein publishes no detection-depth figure
The Klein MSF100 is $14.98 as of August 2026 and the simplest thing here: a flat rare-earth magnet with a bubble vial, a centre notch and a felt pad so it does not scuff paint. It sticks where it lands and stays there as a marker, and Klein suggests hanging several on a wall at once as reference points - a good way to watch a stud line emerge. Klein publishes no detection-depth figure, so its behaviour through thick plaster is unanswered by the spec sheet.

Franklin ProSensor M150
Franklin lists nine sensors rather than the usual one or two, no calibration step, detection to 1.5 inches deep for wood and metal studs, an LED display that shows the full width of a stud, and live wire detection.
Pros
- Shows the full width of the stud, not just an edge
- Nine sensors and no calibration - start scanning anywhere
- Stated deep detection to 1.5 inches
- Live wire warning before you drill
Cons
- Four times the price of a magnet
- Needs two AAA batteries and is not rated for rechargeables
- Density-based sensing can still be confused by what is behind plaster
If the guessing is not worth it, the Franklin ProSensor M150 at $39.97 as of August 2026 is where we would jump, and it is our pick in the best stud finders for DIY too. Franklin lists nine sensors instead of the usual one or two, no calibration step, detection to 1.5 in deep for wood and metal studs, an LED display showing a stud's full width rather than an edge, and live wire detection. It needs two AAA batteries and is not rated for rechargeables, it costs four times a magnet, and density-based sensing can still be confused behind plaster.
Put simply: the StudPoP if you want a magnet that tells you rather than one you interpret, the Franklin ProSensor M150 if you want the stud's full width and a live-wire warning before the drill goes in.
The short version
You do not need to buy anything to hang that bracket today. Sweep the wall slowly with the strongest magnet in the house, insist on two hits in a vertical line before you believe it, cross-check at 16 in and then 24 in, and confirm with a pinhole somewhere the bracket will cover. Knocking and raking light narrow the search; they do not end it. Whatever you find, keep fixings short, stay clear of the space directly above and below outlets, and never drill blind.
When you are ready to stop improvising, our guide to the best measuring and layout tools covers the tape, square, level and stud finder we would buy first, in that order.
About the Author
Cheryl Thompson
Cheryl Thompson is the tools editor at The DIY Tool Review. A lifelong fixer and self-confessed tool addict, she has spent years buying, borrowing and wearing out hand and power tools across home renovation, furniture building and everyday repairs. She writes hands-on, no-nonsense reviews to help fellow DIYers spend their money on the tools that actually last.